This is the second part in a multi-part series about the automation of VMware vSphere template builds. A template is a pre-installed virtual machine that acts as master image for cloning virtual machines from it. In this series I am describing how to get started on automating the process. As I am writing these blog post while working on the implementation some aspects may seem “rough around the edges”.
- Part 1: Overview/Motivation
- Part 2: Building a pipeline for a MVP
- Part 3: An overview of packer
- Part 4: Concourse elements and extending the pipeline
This part will focus on getting you started with a minimum viable product by building a single Ubuntu 18.04.03 LTS template, the twist is a running docker installation inside the template.
Overview
Please make sure you satisfied the prerequisites from the first part and your concourse installation is properly set up. Additionally, I assume that you have git installed on your local workstation and that you have accesss to a vSphere environment with a vCenter, ESXi host(s) and a datastore with sufficient space to store the ISO image and the template.
The high-level steps are:
- Put the Ubuntu ISO image into a vSphere datastore
- Import my example repository from GitHub into your own, private GitHub repository
- Adjust the configuration files to match your environment
- Push the configuration and changes back to your repository
- Upload the pipeline configuration
- Run the pipeline
Getting started
Load the source operating system image
For this example I am using the server version of Ubuntu 18.04.3 LTS (Bionic Beaver). Download the ISO image to your local workstation and then upload it into a vSphere datastore that the cluster containing the future template VM can access. Look here if you need a hint on how to do this.
Going forward I assume that you uploaded the installation image into the folder ISO/ so that the structure looks like this:
[Datastore1]
└── ISO
    └── ubuntu-18.04.3-server-amd64.iso
Note: Packer requires a checksum for the installation image, at the time of writing the ISO file used in the example has the MD5SUM cb7cd5a0c94899a04a536441c8b6d2bf.
As a mid-term goal it would be nice to automate this task as well, I already prepared the govc-container image with wget for this purpose.
Import the example repository into your private repository
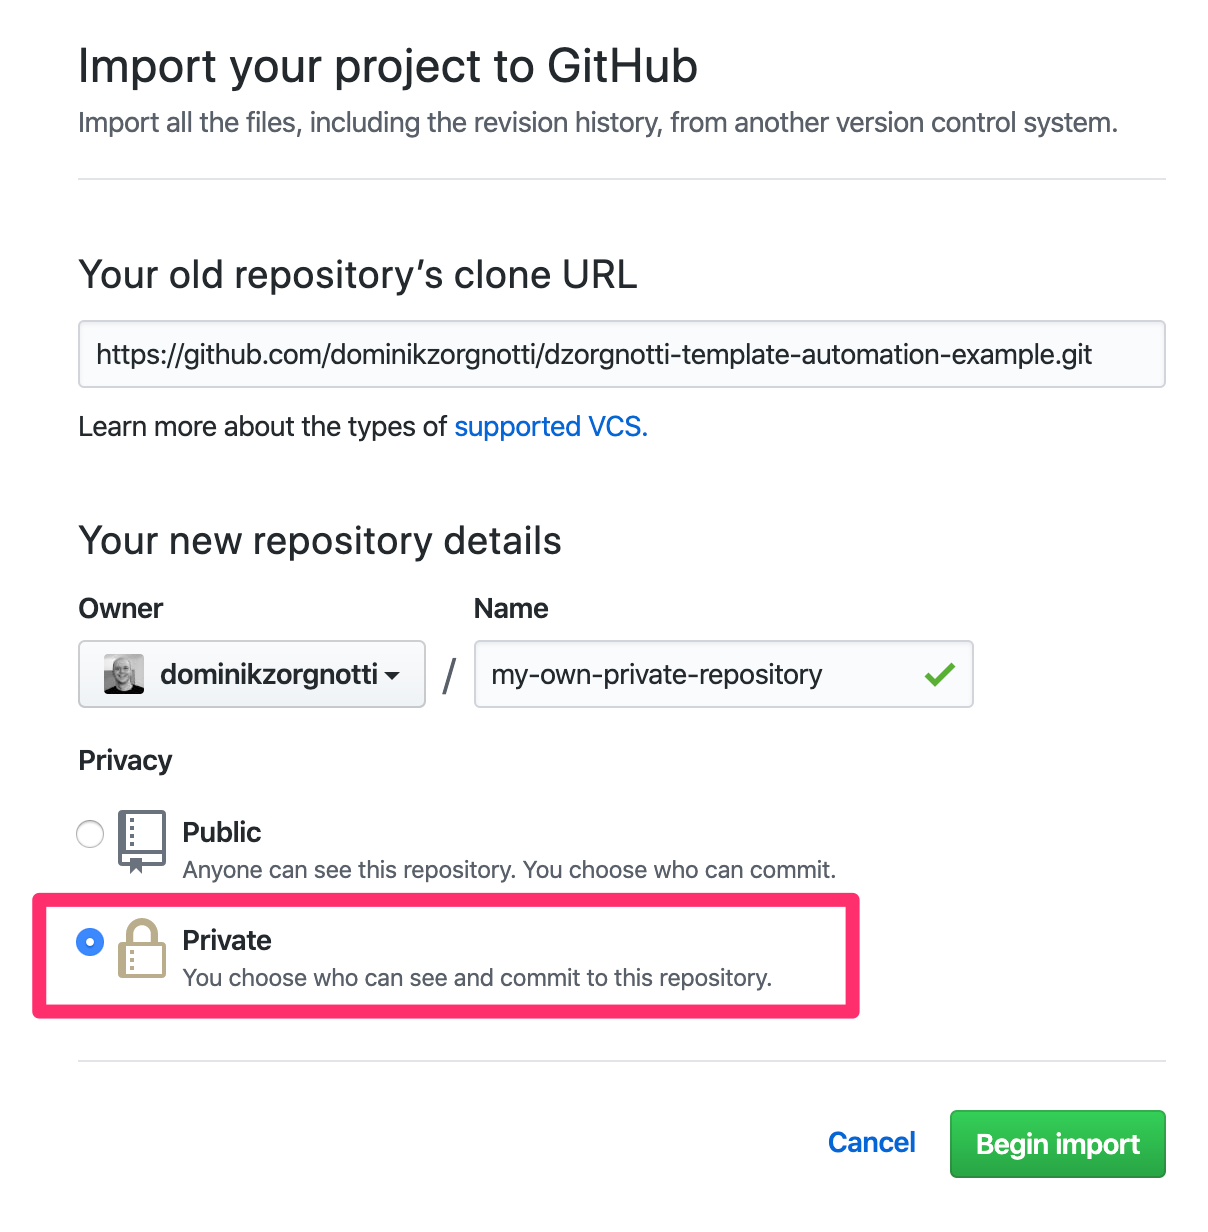
Head over to GitHub and start the import wizard to copy my example repository into your own, private repository. Here is what the screen looks like:

Fill in the values as required:
- Your old repository’s clone URL: https://github.com/dominikzorgnotti/dzorgnotti-template-automation-example.git
- Owner: *you* / Name: *What-ever-you-like*
- Privacy: *Private*
I highlighted private because your are providing the login data in clear text in the configuration files. A follow-up task for further improvements is to find out if I can manage my secrets for the pipelines in Hashicorp vault to get rid of the cleartext stuff on GitHub (I know this isn’t ideal but for the sake of this demo it will do. Just don’t put your production credentials here).
Clone your private repository
Open a terminal on your workstation and clone your newly imported repository from GitHub.
git clone https://github.com/<your github user>/<your repository>.git
cd <your repository>
The directory structure looks like this:
.
├── ci
│   ├── << configuration files for concourse ci >>
└── packer
    ├── common
    │   ├── << configuration items shared between all templates >>
    │   ├── files
    │   │   └── ...
    │   └── scripts
    │       └── ...
    ├── << main configuration files from each templates >>
    └── ubuntu180403docker
        ├── << template specific setup files >>
        └── scripts
            └── << template specific scripts >>
Adjust the configuration files
You need to adjust the configuration so that the values match your local environment. Use the editor of your choice and modify these files:
.
├── ci
│   ├── local_variables.yaml
│   └── pipeline-ubuntu180403.yaml
└── packer
    ├── common
    │   └── common-vars.json
    ├── ubuntu-180403-docker.json
    └── ubuntu180403docker
        └──preseed_180403docker.cfg
I marked the required values with double greater/lesser than signs (« ») inside the files, please make sure you remove these before going on :-)
Push the template configuration to your GitHub repository
Once you have completed all the required changes it is time to push all the files back to your own repository.
git add --all
git commit -m "Added my configuration data"
git push -u origin master
Hopefully it ends up with a success:
   [...]  master -> master
Branch master set up to track remote branch master from origin.
Especially if you are new to all this git stuff you should also check your repository over at GitHub to see what has happened.
Upload the pipeline configuration to Concourse
Everything is now in place to prepare the pipeline.
I recommend setting up an alias (here: build-templates) for accessing concouse ci, after that the actual pipeline can be created.
cd ci/
fly -t build-templates login -c http://<CONCOURSE FQDN or IP>:8080/
#  [you are asked to access the concourse ui to confirm the token]
fly -t build-templates set-pipeline --pipeline build-ubuntu180403 --config pipeline-ubuntu180403.yaml --load-vars-from local_variables.yaml
#  [some output]
apply configuration? [yN]: y
pipeline created!
you can view your pipeline here: http://<YOUR DOCKER HOST>:8080/teams/main/pipelines/build-ubuntu180403

the pipeline is currently paused. to unpause, either:
  - run the unpause-pipeline command:
    fly -t build-templates unpause-pipeline -p build-ubuntu180403
  - click play next to the pipeline in the web ui
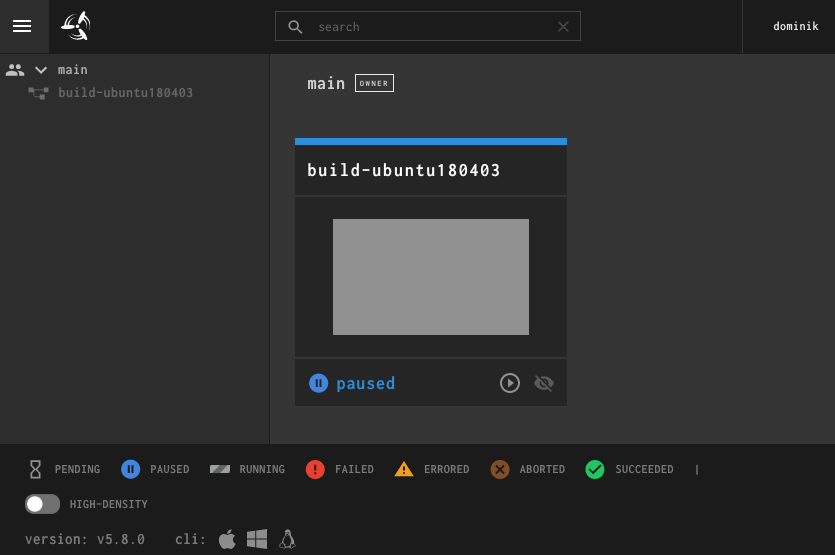
You can decide to unpause the pipeline now by CLI or in the UI as my screenshots show.
Run the pipeline
Switch back to the concourse UI in your browser and you should see the newly created pipeline. Click on it to proceed.

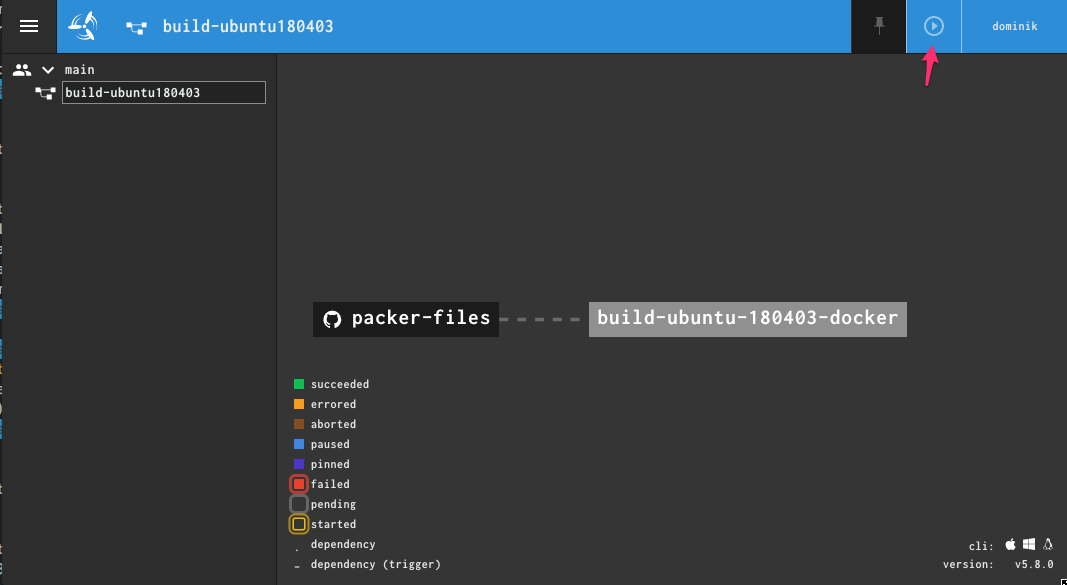
You can the resources (here: packer-files) that come from GitHub as well as the job. If you did not use the CLI beforehand use the play button on top to unpause the pipeline. Next, click on the job for more details.

As the job didn’t run yet there is no output, but it will come once you start it. Use the “+” button to run the job.

The screenshot on top of the page shows the in-progress screen. During the build process you can open up the vCenter and follow the process by opening a remote console on the template VM. If all went well you will see a powered-off VM as build artifact after the job completes, it takes about 15 minutes.
Update 2020-01-22: Managing changes
After running the pipeline check out the template VM.
Power it back on, login and see if the setup works for you. You can adjust the packer parameters and configuration files and restart the build job, but remember to push the changes back to GitHub. Every time the job will check your online repository at GitHub for the latest commit in the master branch.
If all that git talk didn’t make any sense to you (yet), start with a tutorial here or here.
Summary
What came out as a short blog post was a quite a learning experience for me. I knew nothing about concourse CI, some basics about packer and did fall into some traps with docker and pre-build containers. In the end, I even needed to publish my own container images on docker hub.
Still, I hope you enjoyed this post and I would love to hear back from you.
The next part(s) will focus more on what is actually happening inside the pipeline and the packer configuration before I try to extend the pipeline with further steps.


Comments